our little minnow: a moana themed birthday
its been three years since i turned our previous living space into a hawaiian haven but i thought id pull some snaps together to share how i created marlows second birthday look… and as im finally posting this weve just done the whole theme again for her younger sister
moana was our soundtrack for life that year, and the songs spark such fond memories in our house (especially given wee roo now shares a love for the polynesian princess), it only seemed fitting to document it here too, before the magical details are lost to memory alone


you will need
thick card in colours bright pink, yellow, white, pale blue, pastel yellow, orange and varying shades of green
toilet roll tubes
glue gun
cardboard letters (to spell out their age); i picked mine up in aberkhans in liverpool
table skirt ‘hula-style’
scissors
glue dots
biodegradable balloons of varying colours (confetti filled, white, green, blue, orange, pastel pink and bright pink)
balloon arch strip (this may be included if you buy a balloon arch kit)
balloon pump (optional)
command hooks specifically for balloon arches (be warned these can pull off the paint, i usually just re-touch up the spot afterwards)
what to do
creating a balloon arch
blow up all your balloons (i enlist ryan to this job each year generally)
then simply push each balloon knot through the holes in the balloon strip
when the strip of balloons is at the desired length, you can simply use the strong adhesive command hooks to attach it to the wall (sometimes if its particularly heavy i have attached them with string through the balloon strip holes and around the hook on the wall for extra strength)
blow up some balloons smaller in size - you can stick these in place to add dimension to the balloon arch with a single glue dot on each mini balloon
to finish simply push the green leaf foliage in between the balloons after the arch is secured on the wall
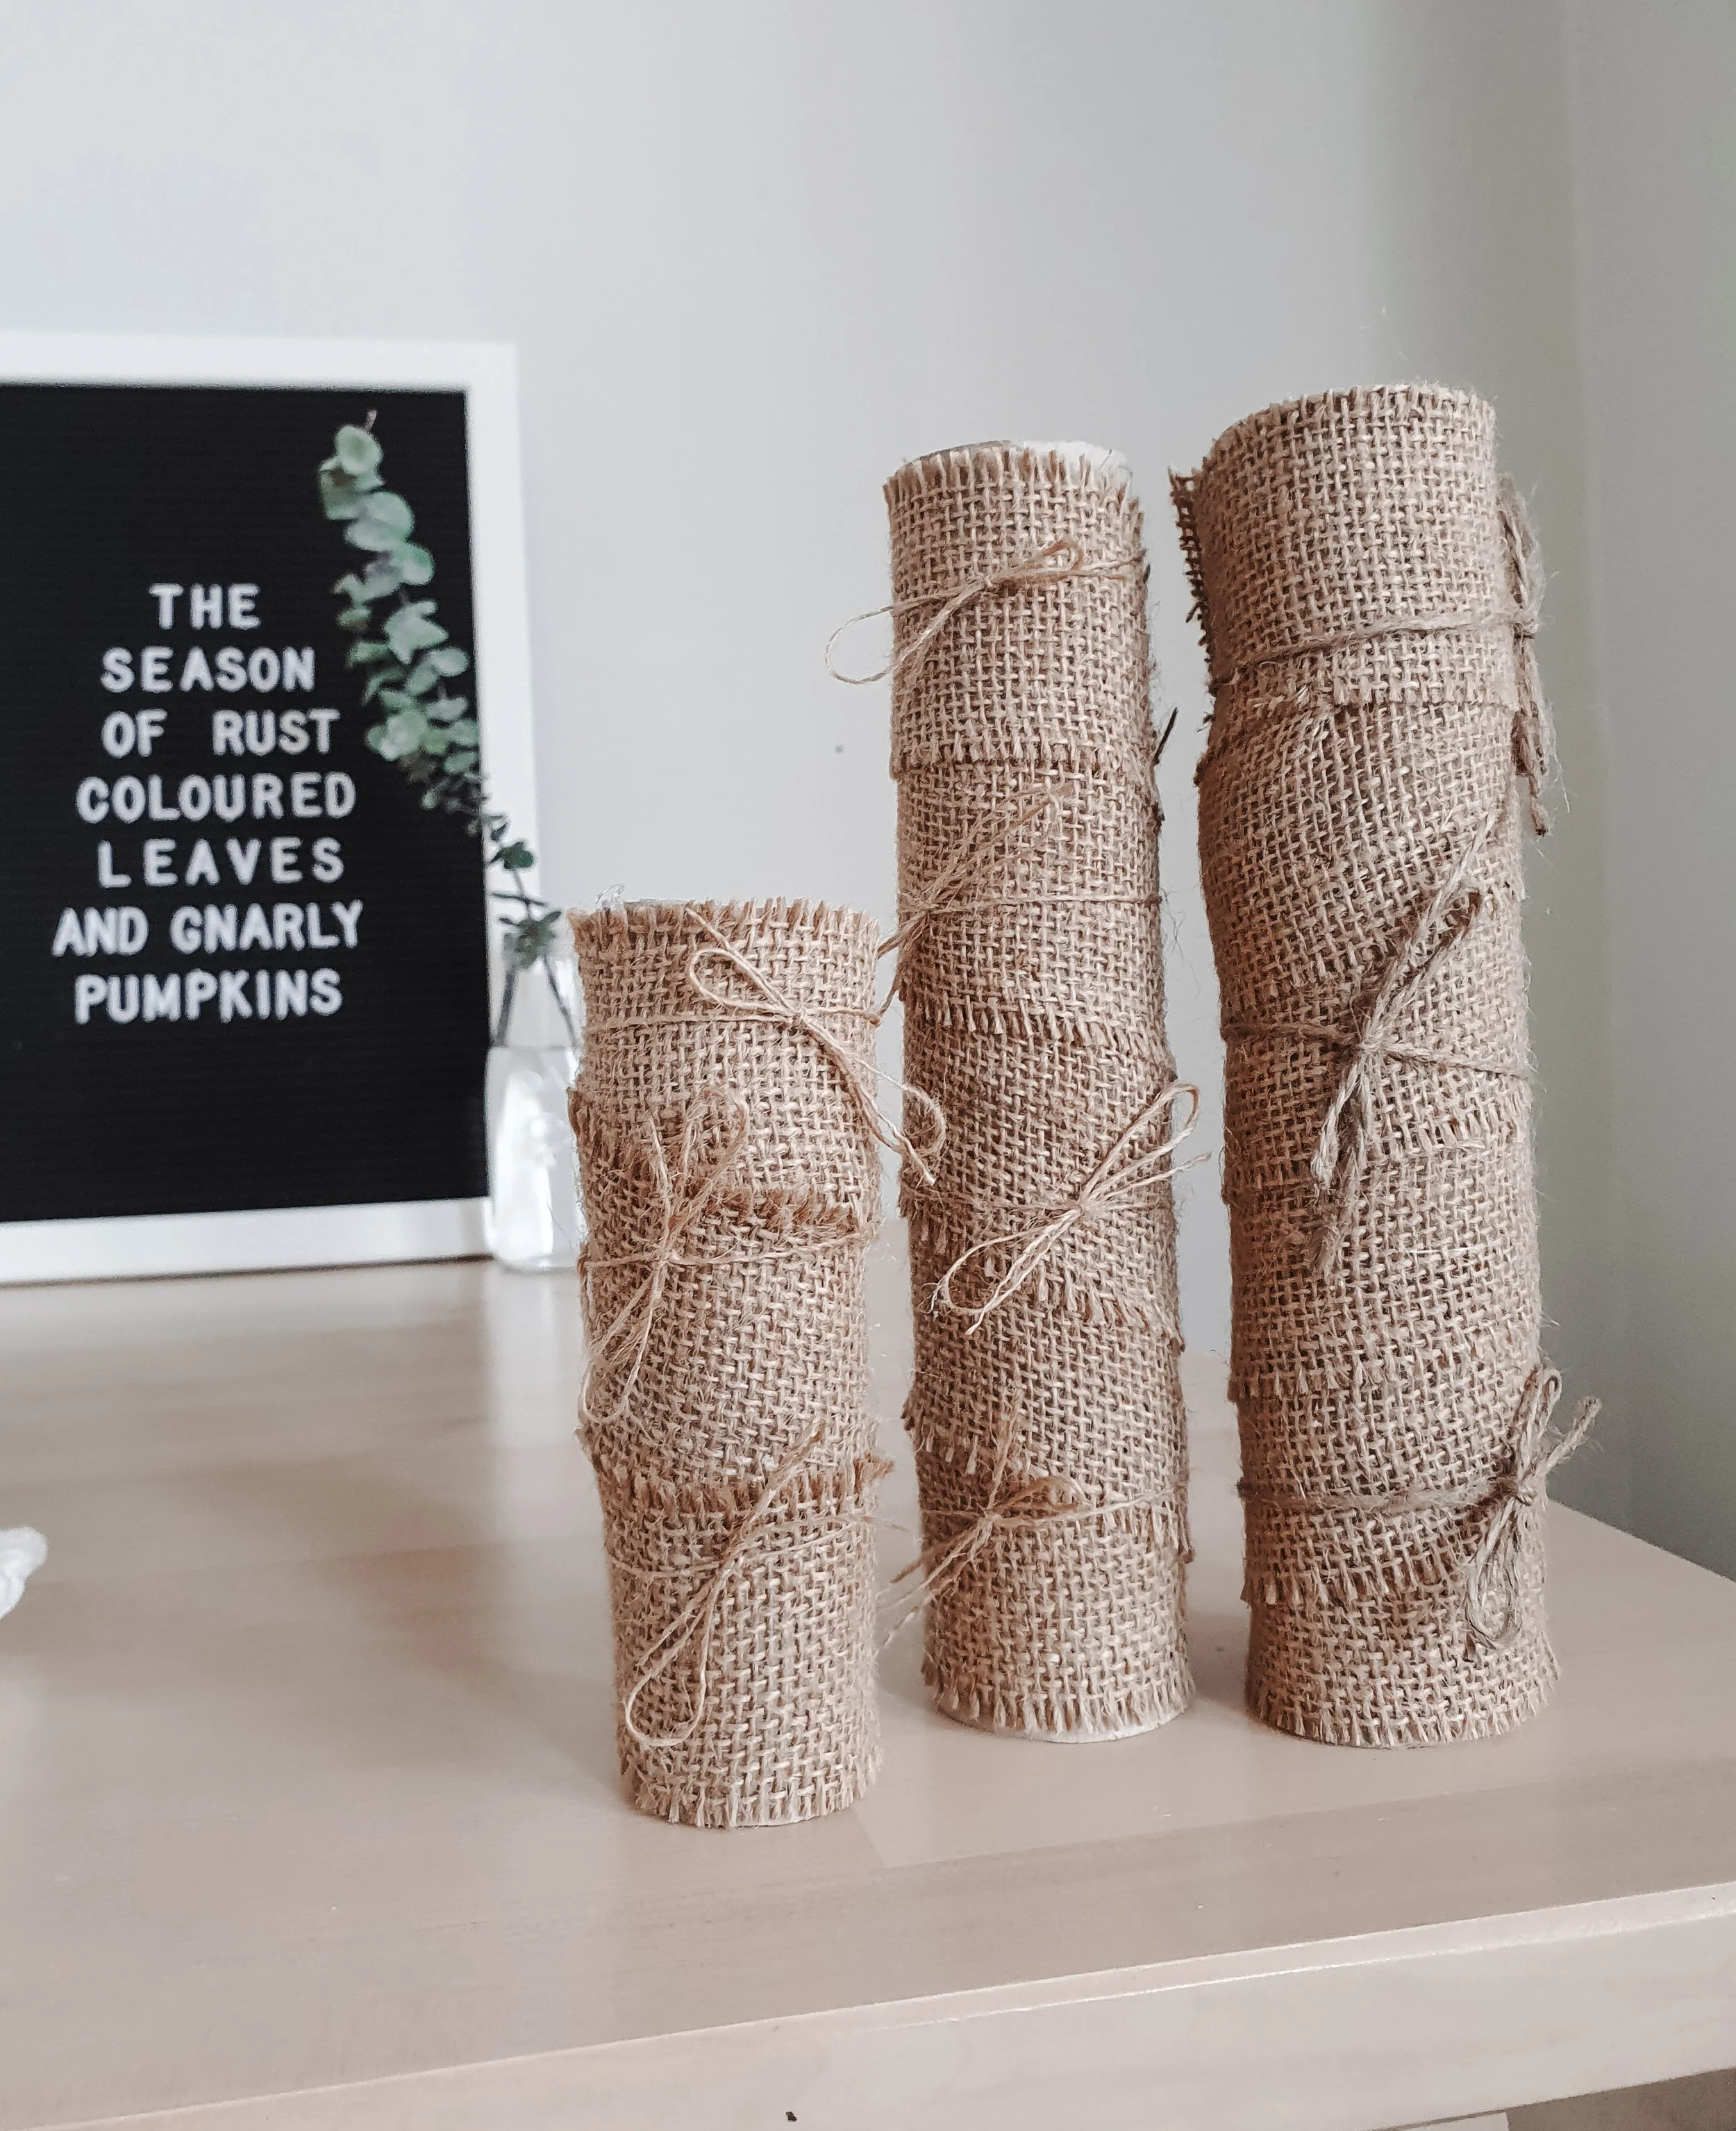
cardboard tube table palms
simply wrap your burlap gauze (trimmed to size) around the toilet or kitchen roll tubes and affix with hot glue or glue dots. i then secured these further by wrapping additional lengths of twine around each section of burlap gauze and knotting it with a visible bow in place.
i cut out palm leaves from varying shades of thick green card (with one fold down the middle to give them a 3d effect) and simply hot glued the ends of these into the tubes.
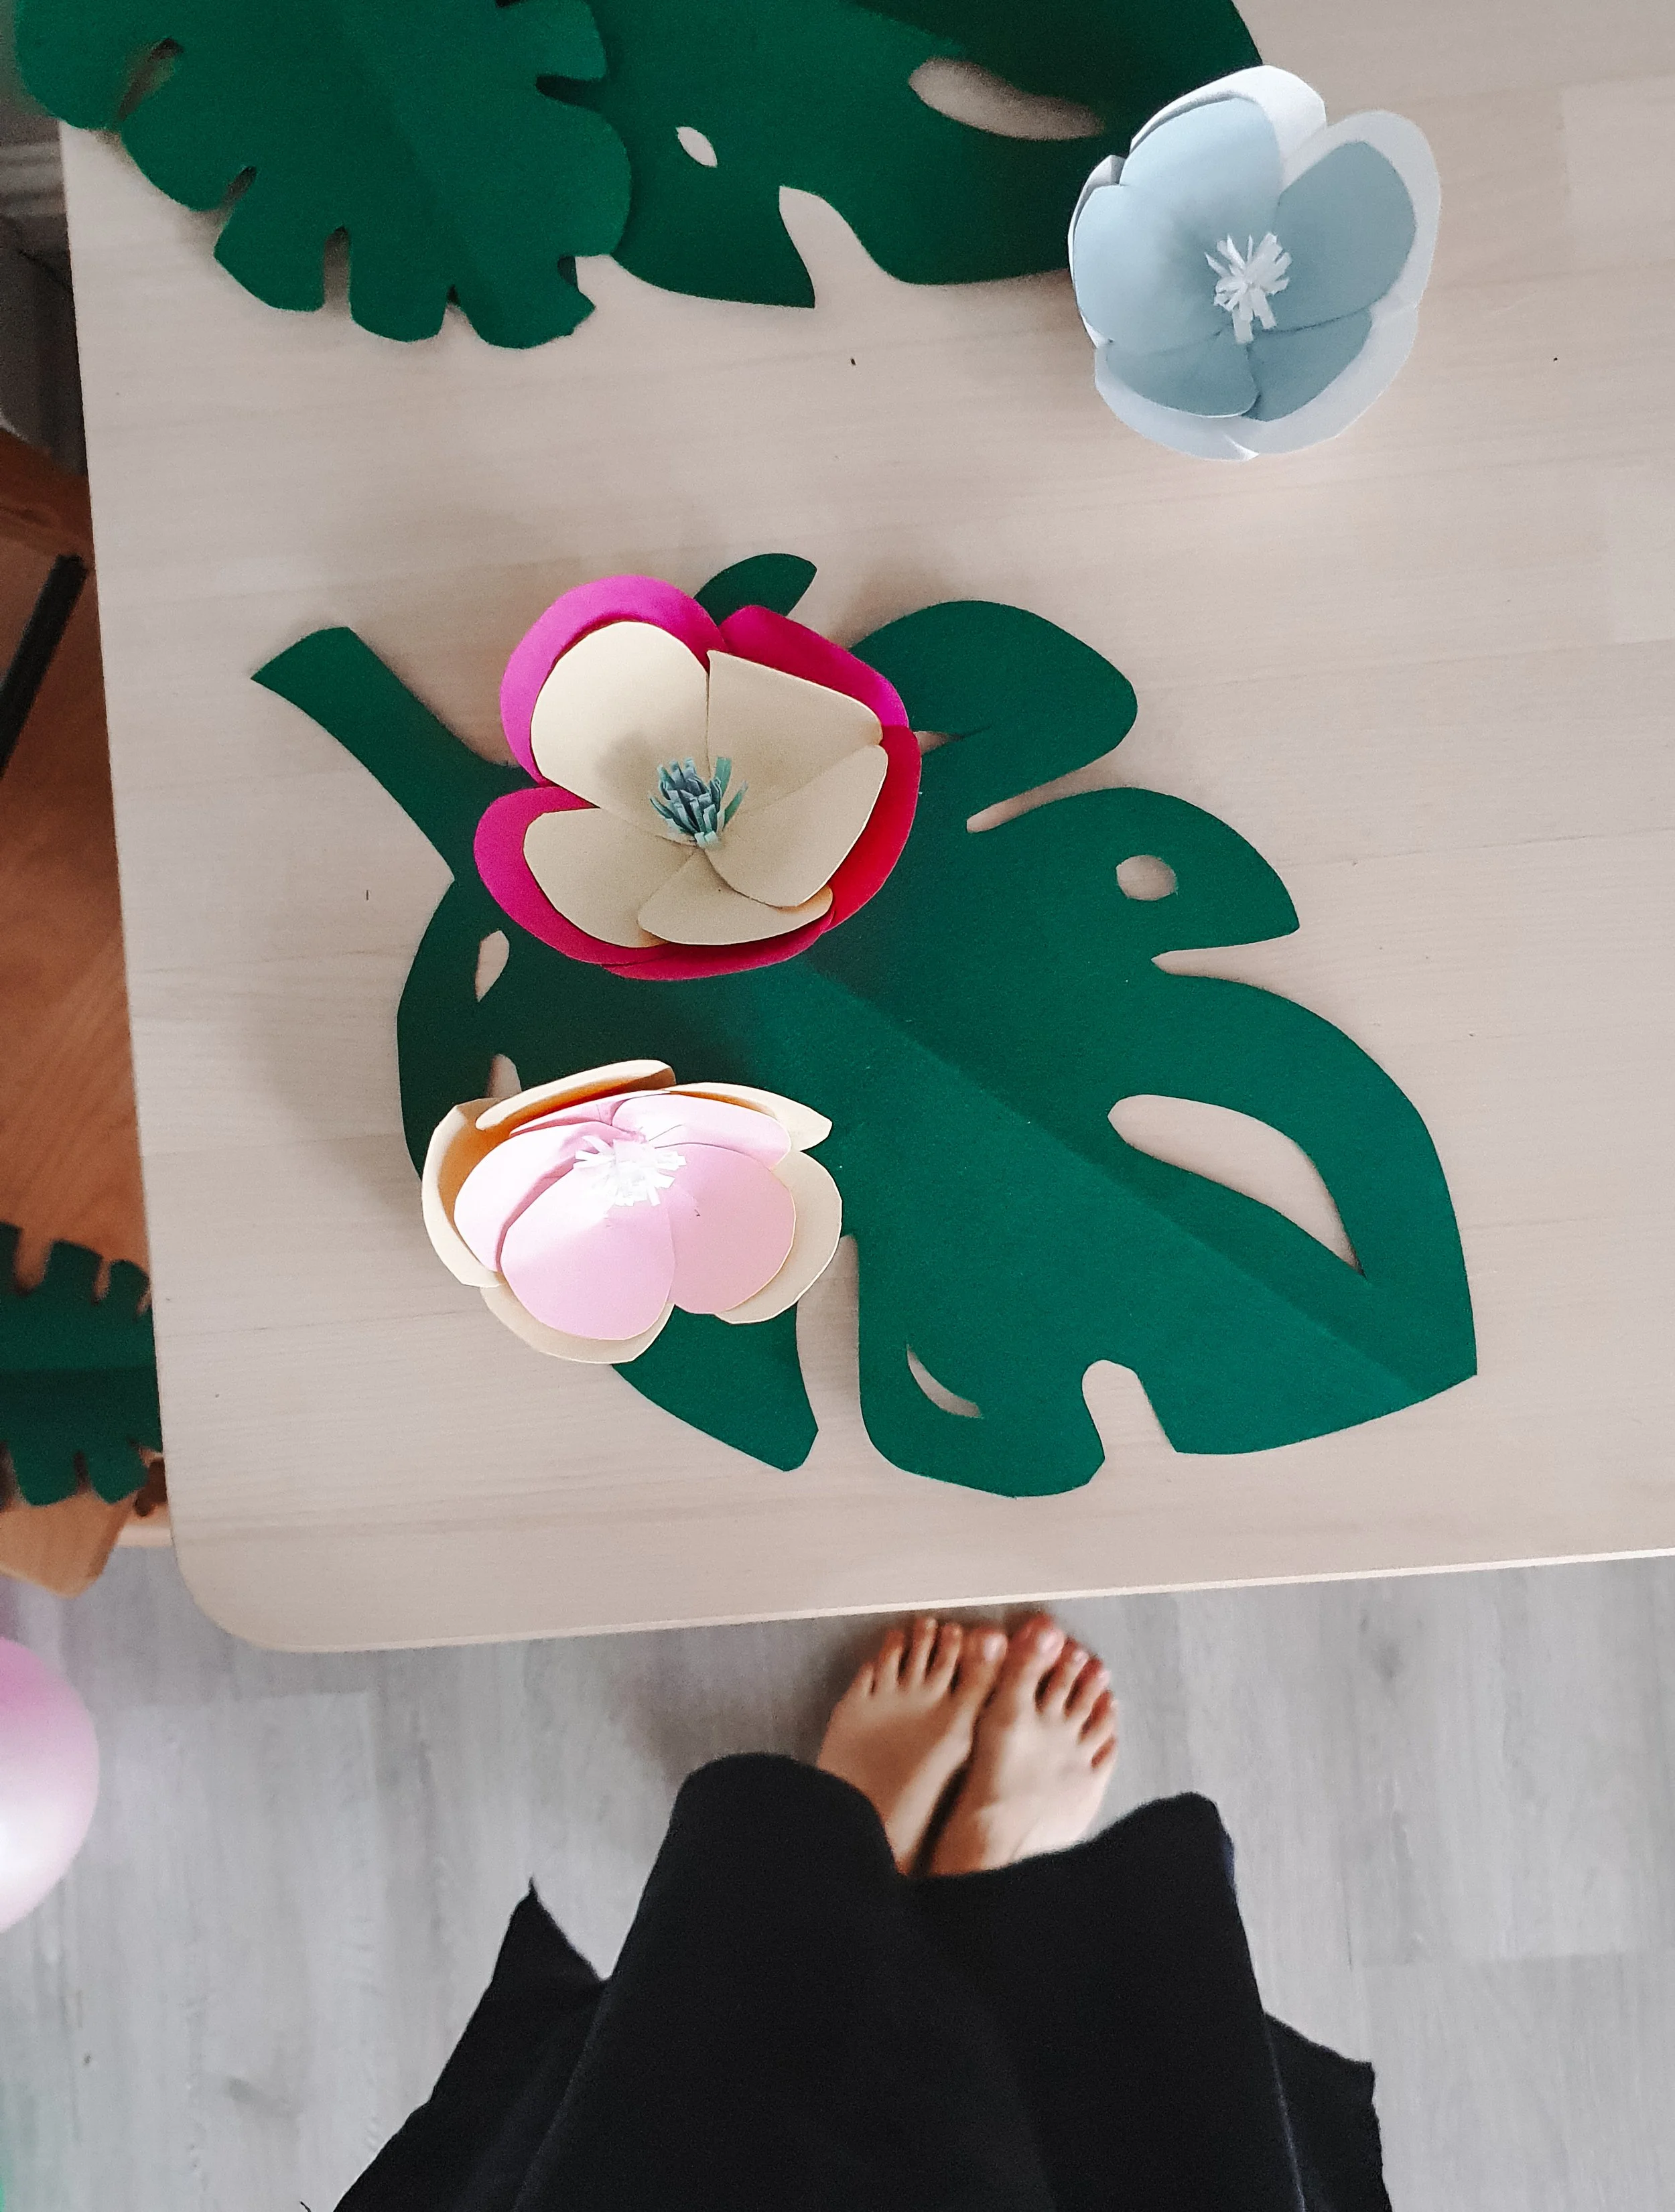
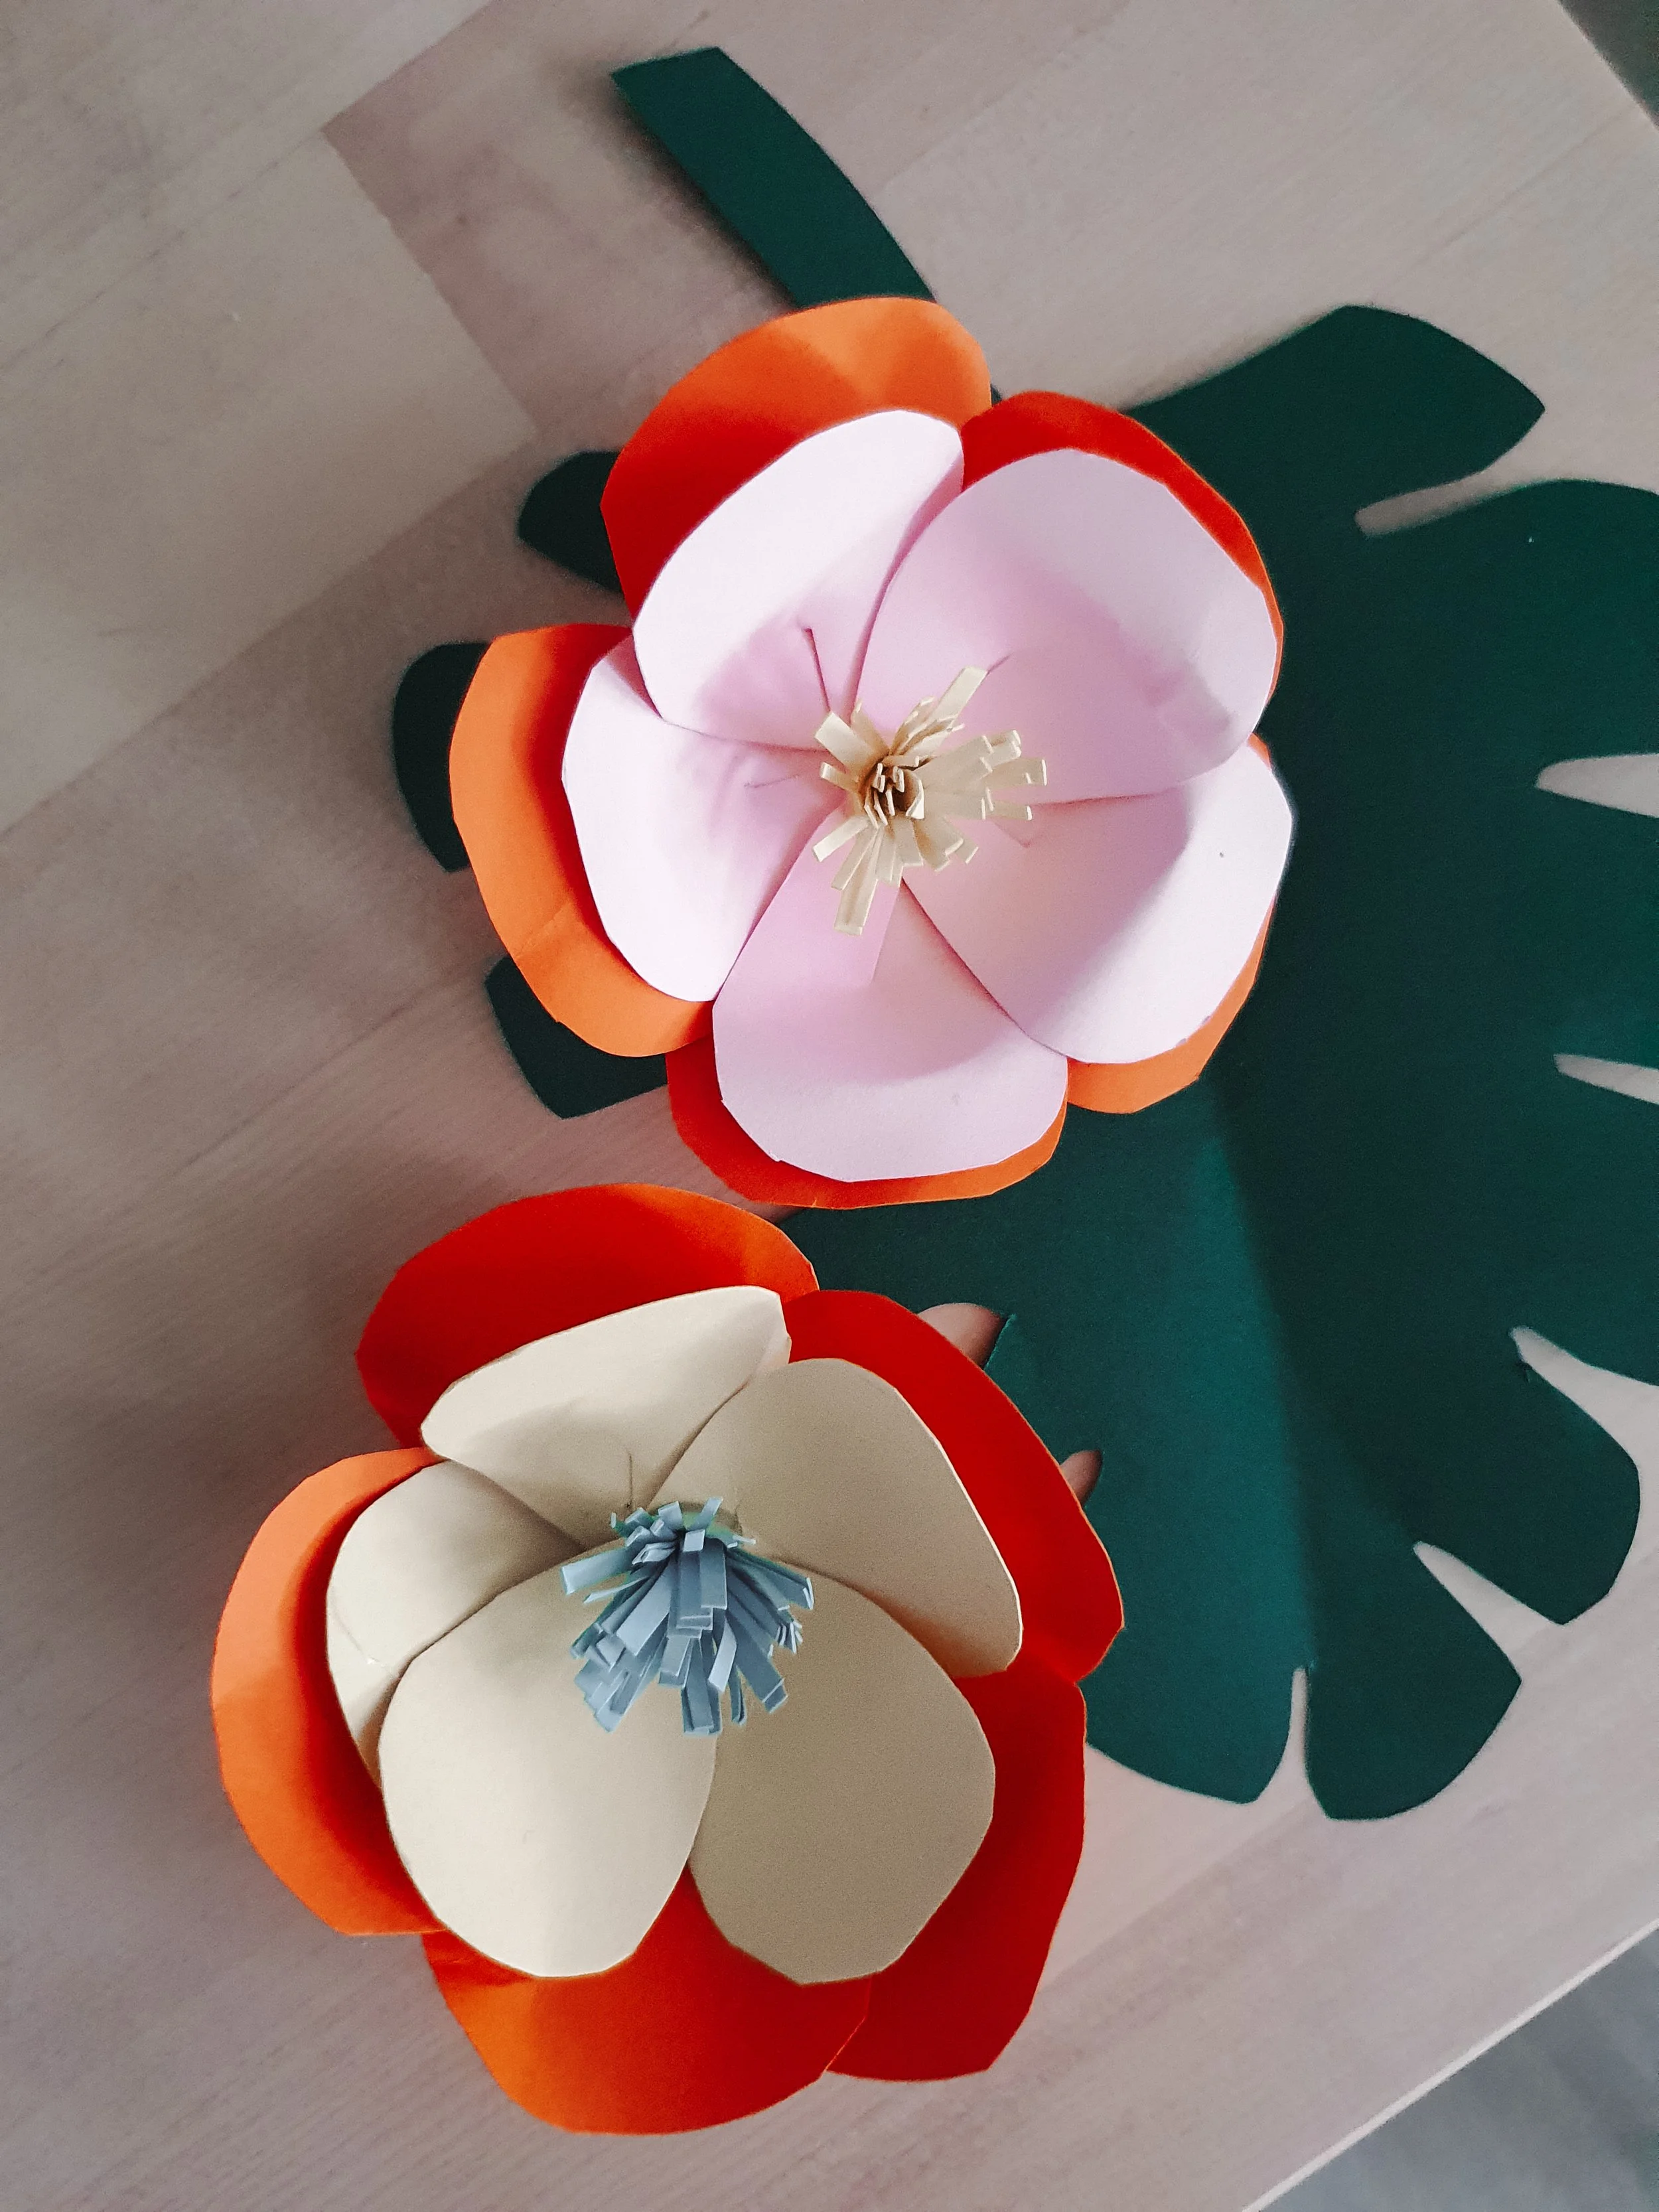
cardboard flowers and leaves
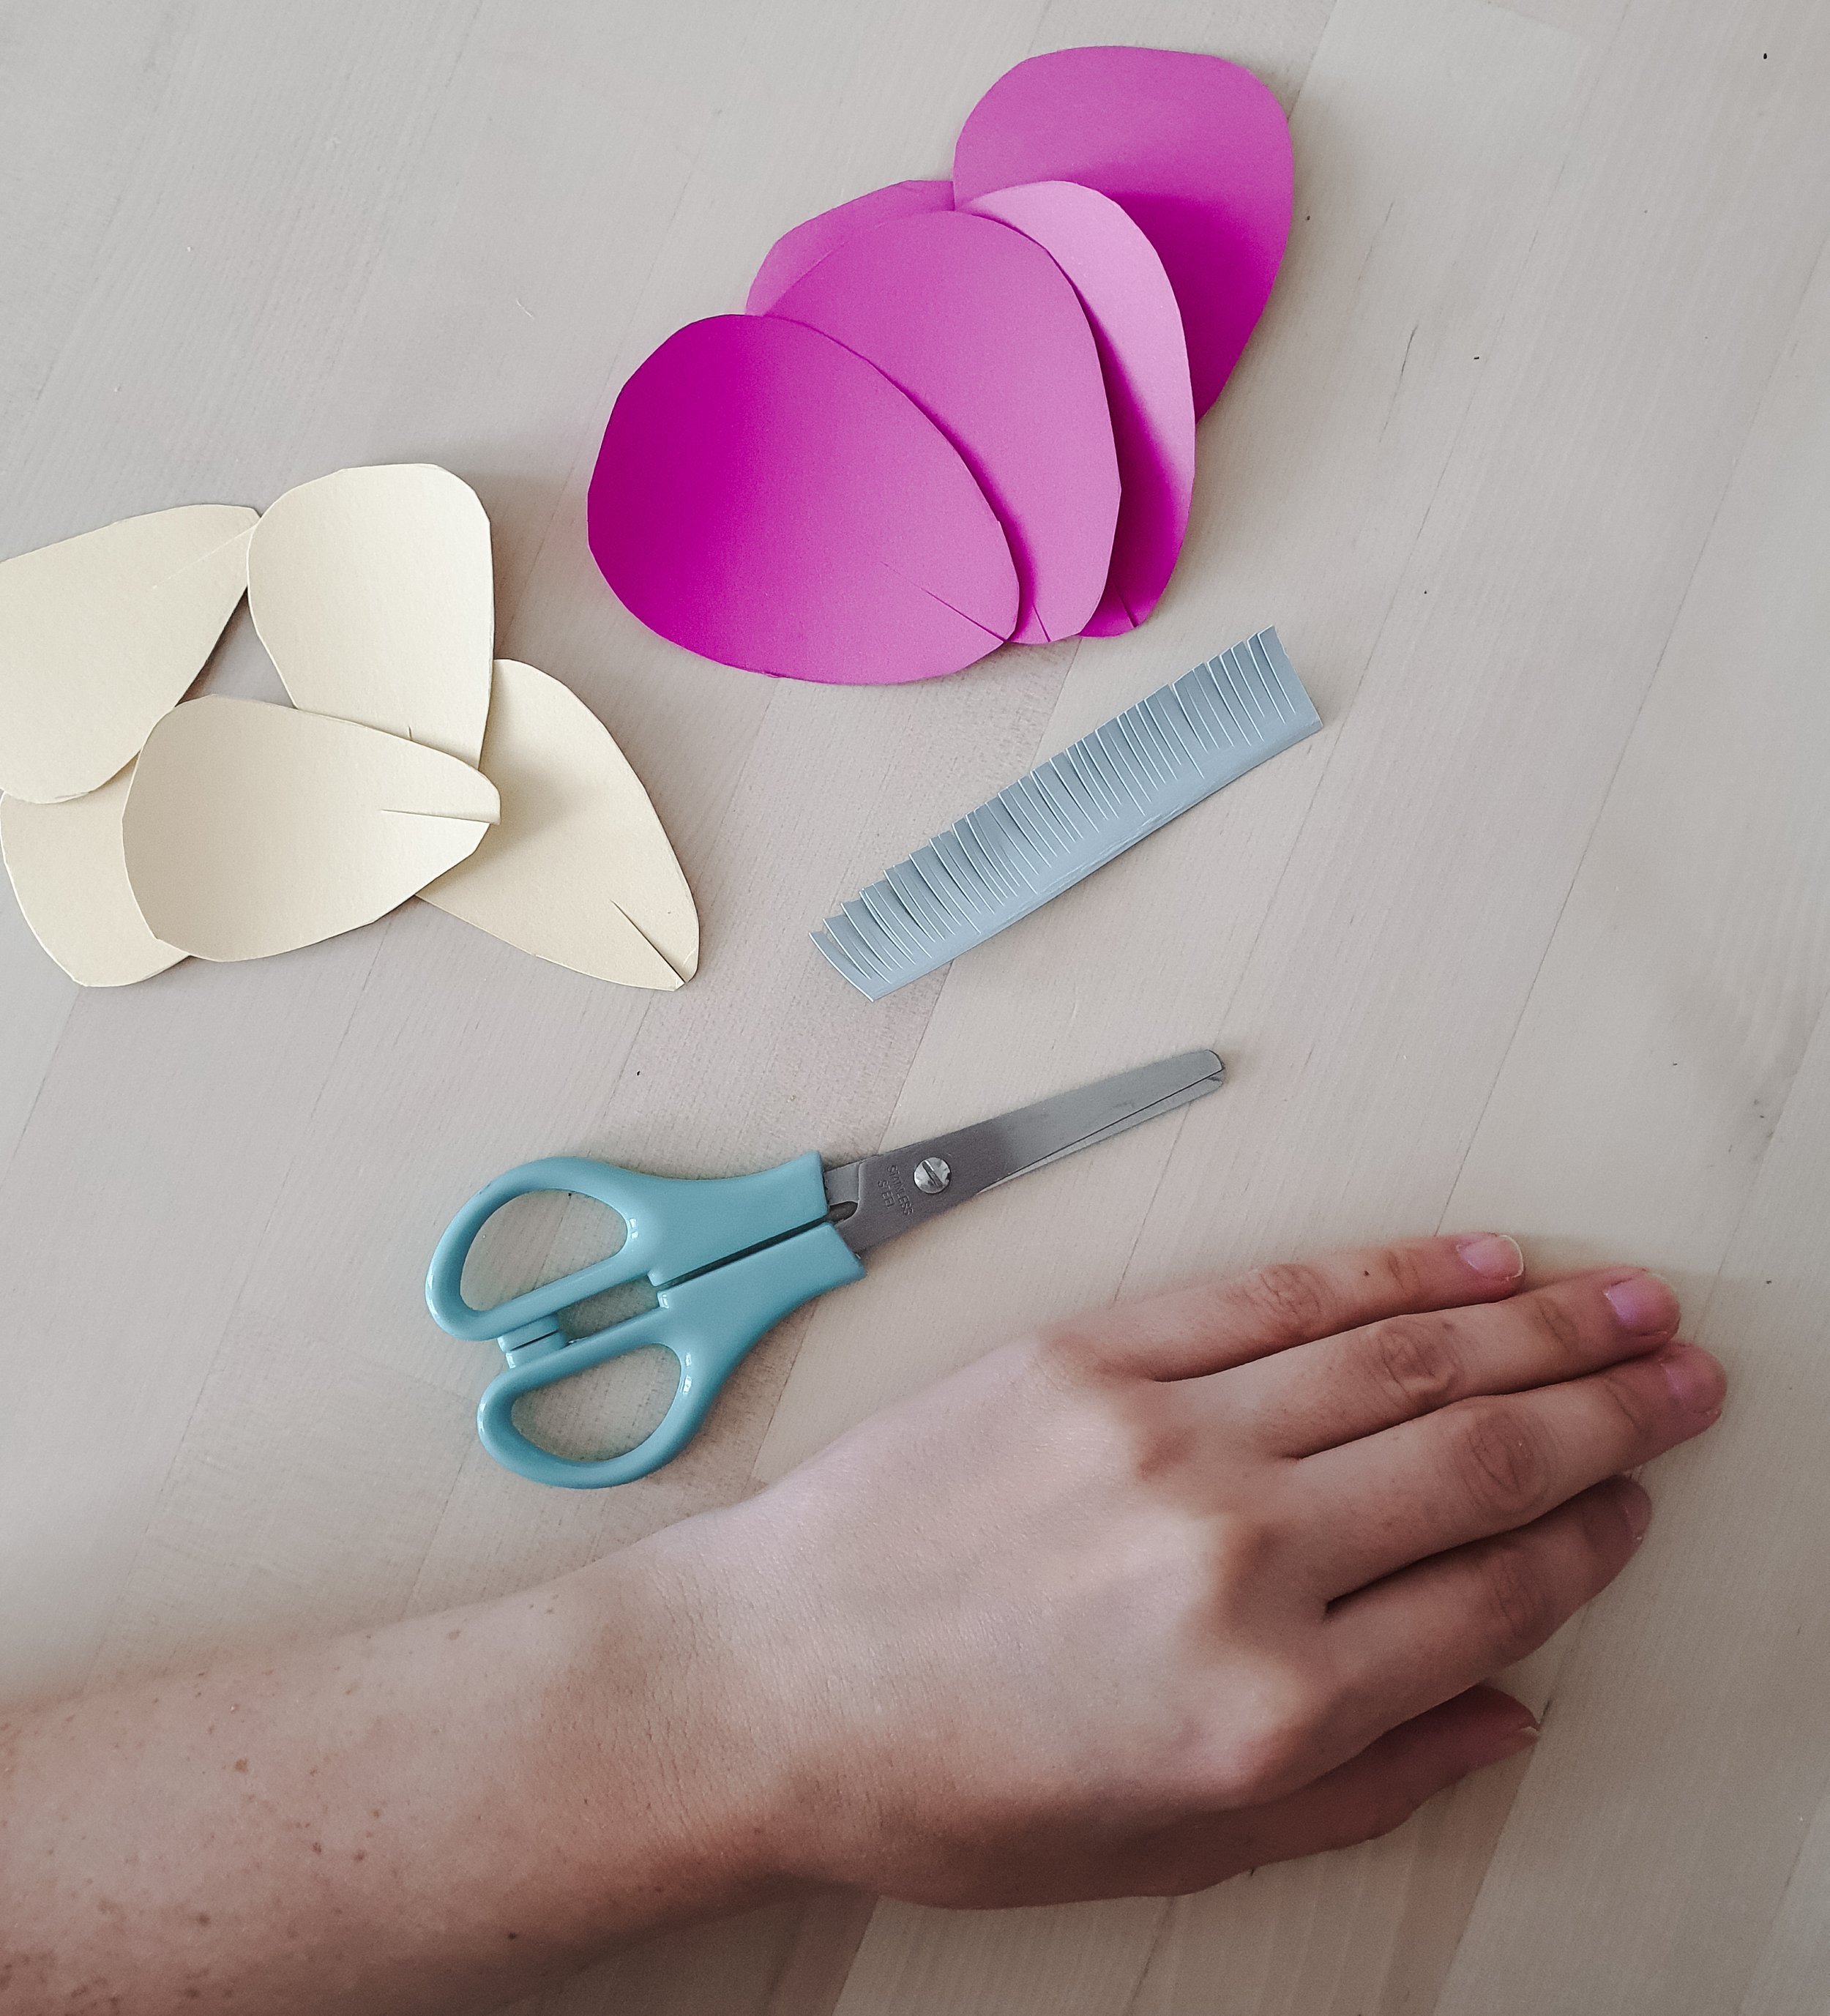
for the cardboard flowers, cut out rough petal shapes. cut a slit in each petal (around a cm in length) from the bottom upwards. each flower will need around 5 petals for the inner and outer layer, which i cut in contrasting colours.
start one petal at a time and hot glue each one folding it at the bottom (so where you have placed the cut, one section lies on top of the other.
hot glue them in place, one petal on top of another.
for the central frill; cut a long strip and put little cuts all along it as pictured. then roll this in on itself and hot glue it down in the centre. for extra images see this felt petal tutorial (as the principle is the same).
bringing together the theme
a hula skirt for the table (which would not sit right on our table no matter how hard i tried to glue it in place!)
these decorations got a lot of use! we passed them onto a friend for his birthday, and then when they came back to me, i managed to sell them all on vinted for another child to enjoy.
just goes to show that a little love can go a long way.